.. and watch the African violet vendor websites for announcements of 2013 plant lists!!!!!
Yippee! Thoughts of green grass, garden flowers, and fresh salads help us deal with piles of snow and cold winds!

December 30, 2012
December 19, 2012
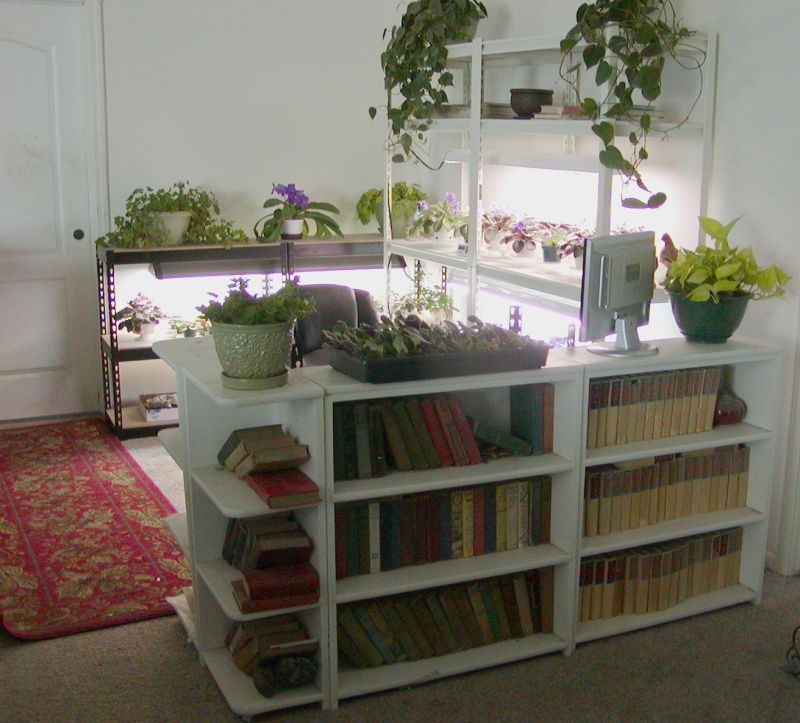
My new Violet Corner -- unfinished
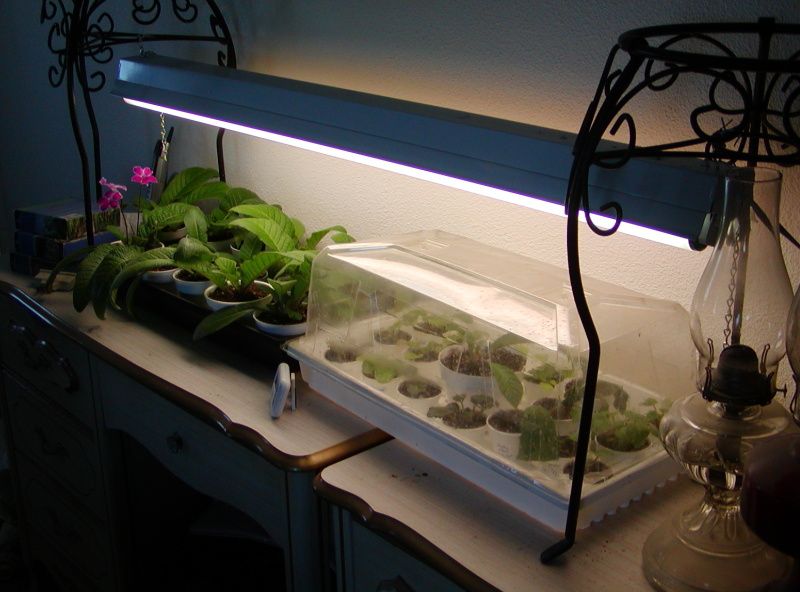
My new violet corner is not finished... not by a long way, but I just had to take a photo! :)

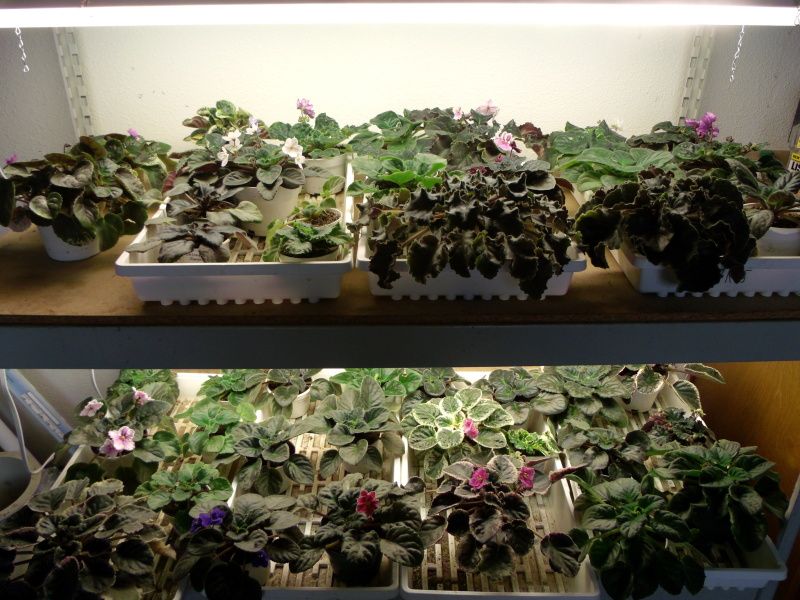
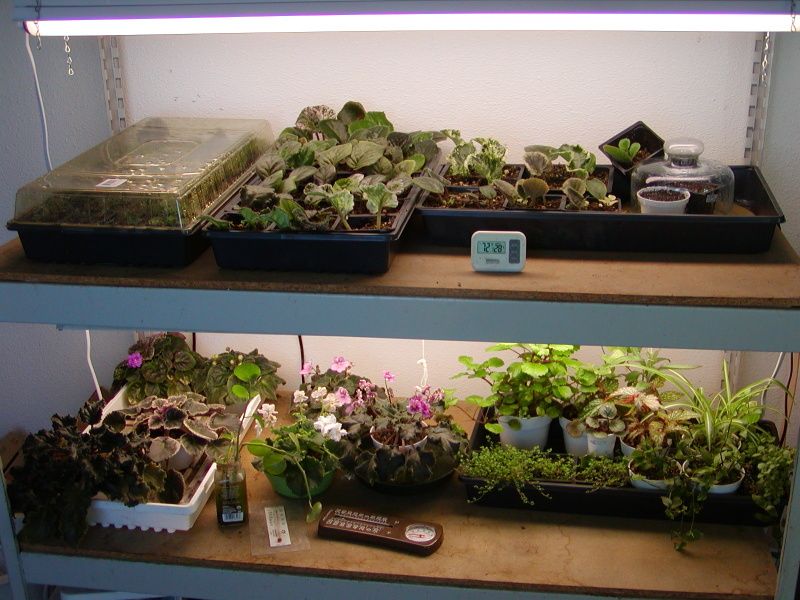
Below, is a photo of my personal collection of plants... the ones I am keeping for myself, taken in October when they were on two shelves on my bathroom stand.
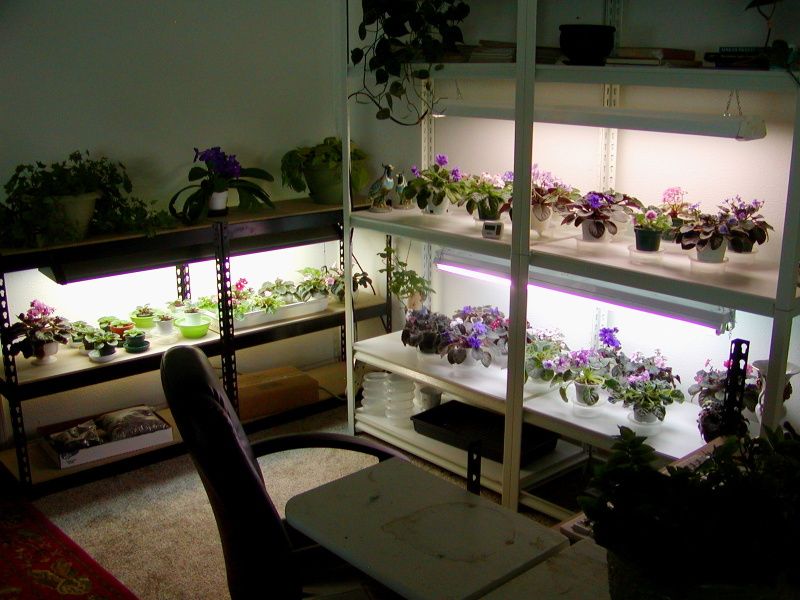
 Two months later, here they are on the stand in my new violet corner:
 Here are the extras and for sale ones in the porch:
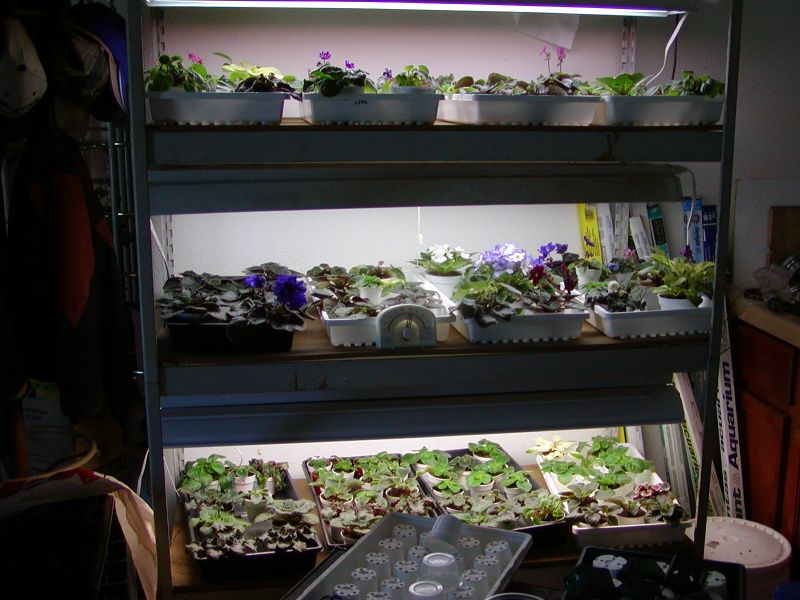
 The streps and a few young av rooted suckers in the bedroom:
 Last, the stand in the bathroom has the most recently planted leaves, foliage plants, and etc.:

A Few STATISTICS:
I have 178 individual African violet plants, and 18 strep plants.
Approx. 65 are my 'personal collection' plants, with the rest as duplicate plants to either sell or give away.
I have about 1/3 of my plants potted up, and all the extras are potted up into at least 3 inch pots. If I can finish repotting my personal plants, I will be all ready to begin transplanting babies from mama leaves.
Oh, yeah.... I have 140+ leaves set. :)
Now to compare my AVs from October to my AVs now.Below, is a photo of my personal collection of plants... the ones I am keeping for myself, taken in October when they were on two shelves on my bathroom stand.
December 17, 2012
Mildew Rears It's Ugly Head!
Okay... I've finally admitted I have to TREAT powdery mildew!!! For the past two weeks, since we started the wood stove and the house temps have changed, I have been noticing a few blossom stalks on larger plants on one stand had mildew on the stems and some on the petals. I DID NOT find any mildew on the other stand in a different area! :)
So, I began TREATMENT with the only true first step: PREVENTION! I took off all stalks with open blossoms... and moved the plants to a better area! The temps in the new area don't drop so low at night, and the difference between night and day temps is not so large. This new area is one side of our living room, and we walk by the violets many times every day, creating a little 'stirring' of the air.
That was two weeks ago, and I have not seen any sign of mildew I will keep a close watch but I expect not to have much problem.
The original shelves where the mildew developed are in the bathroom. It is a large bathroom, and we do run a fan for several hours a day, and there is not high humidity. The problem is that it is an 'isolated' room, on the outside wall, and several rooms away from the wood stove. When the wood stove is stoked and working, the main furnace does not run, and yet the heat from the wood stove does not warm the bathroom. We use a small heater/fan for those times we use the shower, so the daytime temps aren't too bad, about 66-72 degrees. But the night temps often drop to 60 degrees.
Today, I noticed the oldest tray of mama leaves had a well-advanced case of MILDEW!! Yuk! I was checking on them nearly every day, but they were growing at the pace that a watched pot boils! So, I decided to let them be for a few days. So, I missed the first signs, if it came slowly. It could have developed in the last week, since I watered them a week ago, but I didn't look too closely!
I did a quick check on the new stand, and the large plants were free. I looked over the stand that has the 'extras' and for sale plants. They are in a good environment similar to the new stands,and I have been misting the area with Lysol spray, just to keep the selling plants clean. It seems to have done a good job.
But those propagating leaves were horrid, and needed quick help. I did some research in the violet books, and Nancy's book, etc. I decided not to rely on the Neem Oil as it seemed it worked best for prevention. I didn't have the stronger chemicals... so went to work with what I had.
I have had good results with simply washing the mildew off on a very regular basis, keeping the shelves and area clean, the Lysol spray, and improving the growing environment. So, I mixed a milk/water/clove oil solution, and began to brush it THOROUGHLY over all the mama leaf surfaces. I did not brush the baby leaves... except those in the front three pots in the photo below. Just for an experiment! :)
I mean I REALLY COVERED and saturated the leaf surfaces, It wasn't easy, as the hairy leaves, and the mildew itself seemed to shed the solution. I did remove some leaf tips, and some mama leaves completely, if the babies were large and looked sturdy.
I did find one medium plant with some mildew on the blossom stalks and one leaf. So, I completely covered it.
The leaves and plant dried very quickly as I did the work very close to the wood stove and the fan on the stove does move air! I left the leaves and plant in the kitchen for the rest of the day, and will place them in a place that has more even temperatures and good air circulation.
Tomorrow, I will wash and spray the bathroom shelves and give everything a light misting just to keep them safe. Plus, I will double check day/night temps, and make sure it isn't the best mildew environment.
Here are photos:


So, I began TREATMENT with the only true first step: PREVENTION! I took off all stalks with open blossoms... and moved the plants to a better area! The temps in the new area don't drop so low at night, and the difference between night and day temps is not so large. This new area is one side of our living room, and we walk by the violets many times every day, creating a little 'stirring' of the air.
That was two weeks ago, and I have not seen any sign of mildew I will keep a close watch but I expect not to have much problem.
The original shelves where the mildew developed are in the bathroom. It is a large bathroom, and we do run a fan for several hours a day, and there is not high humidity. The problem is that it is an 'isolated' room, on the outside wall, and several rooms away from the wood stove. When the wood stove is stoked and working, the main furnace does not run, and yet the heat from the wood stove does not warm the bathroom. We use a small heater/fan for those times we use the shower, so the daytime temps aren't too bad, about 66-72 degrees. But the night temps often drop to 60 degrees.
Today, I noticed the oldest tray of mama leaves had a well-advanced case of MILDEW!! Yuk! I was checking on them nearly every day, but they were growing at the pace that a watched pot boils! So, I decided to let them be for a few days. So, I missed the first signs, if it came slowly. It could have developed in the last week, since I watered them a week ago, but I didn't look too closely!
I did a quick check on the new stand, and the large plants were free. I looked over the stand that has the 'extras' and for sale plants. They are in a good environment similar to the new stands,and I have been misting the area with Lysol spray, just to keep the selling plants clean. It seems to have done a good job.
But those propagating leaves were horrid, and needed quick help. I did some research in the violet books, and Nancy's book, etc. I decided not to rely on the Neem Oil as it seemed it worked best for prevention. I didn't have the stronger chemicals... so went to work with what I had.
I have had good results with simply washing the mildew off on a very regular basis, keeping the shelves and area clean, the Lysol spray, and improving the growing environment. So, I mixed a milk/water/clove oil solution, and began to brush it THOROUGHLY over all the mama leaf surfaces. I did not brush the baby leaves... except those in the front three pots in the photo below. Just for an experiment! :)
I mean I REALLY COVERED and saturated the leaf surfaces, It wasn't easy, as the hairy leaves, and the mildew itself seemed to shed the solution. I did remove some leaf tips, and some mama leaves completely, if the babies were large and looked sturdy.
I did find one medium plant with some mildew on the blossom stalks and one leaf. So, I completely covered it.
The leaves and plant dried very quickly as I did the work very close to the wood stove and the fan on the stove does move air! I left the leaves and plant in the kitchen for the rest of the day, and will place them in a place that has more even temperatures and good air circulation.
Tomorrow, I will wash and spray the bathroom shelves and give everything a light misting just to keep them safe. Plus, I will double check day/night temps, and make sure it isn't the best mildew environment.
Here are photos:


Here are the leaves and plant after treatment.
The solution was mixed as:
- 16 tablespoons of warm water
- 4 tablespoons of milk (whole, raw)
- 16 shaken drops of clove oil (essential homopathic oil, not culinary)

December 6, 2012
Experiment # 4 -- Soil Mix Additions
Experiment #4 is a Soil Mix Additions Comparison. I chose three small plants of Optimara Bora Bora. All plastic pots to be bottom watered with saucer.

The middle pot has my regular mix of 1 1/2 parts peat moss, 1 part vermiculite, 1 part perlite. The bottom pot has 1/2 my potting mix and 1/2 soil (loam). The top pot has my potting mix with 1/4 part of Happy Frog Soil Conditioner.
The amount of the soil conditioner is not much, but it tested a bit high in ph, and it's purpose was to add just a bit of soil microbe activity, which since I am using 'artificial' mineral fertilizers instead of ones with organic source origins, I really don't know if this all matters! :) But I fell in love with the romance of the idea of all the yummy sounding ingredients in the soil conditioner. It was the only bag of 'peat moss type thing' at the hardware store, so it kept focusing my attention back on it! Gullible consumer that I am!
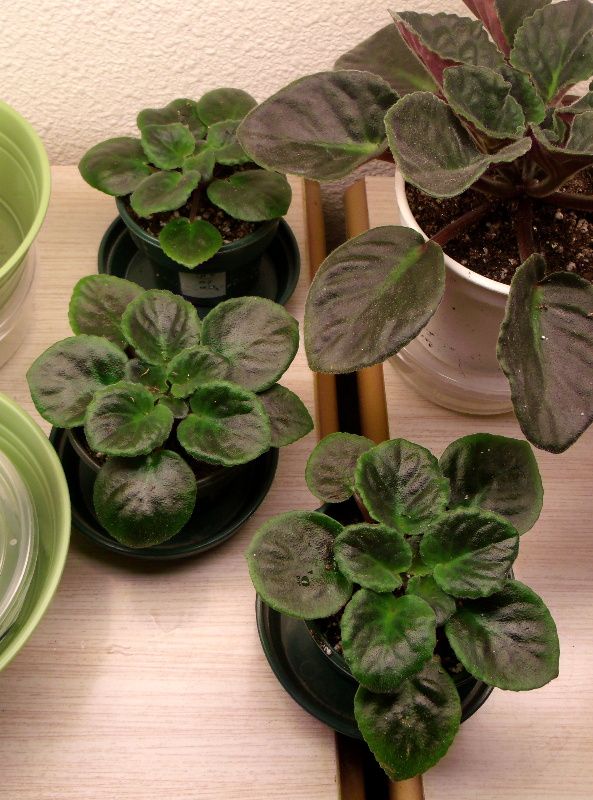
The middle pot has my regular mix of 1 1/2 parts peat moss, 1 part vermiculite, 1 part perlite. The bottom pot has 1/2 my potting mix and 1/2 soil (loam). The top pot has my potting mix with 1/4 part of Happy Frog Soil Conditioner.
The amount of the soil conditioner is not much, but it tested a bit high in ph, and it's purpose was to add just a bit of soil microbe activity, which since I am using 'artificial' mineral fertilizers instead of ones with organic source origins, I really don't know if this all matters! :) But I fell in love with the romance of the idea of all the yummy sounding ingredients in the soil conditioner. It was the only bag of 'peat moss type thing' at the hardware store, so it kept focusing my attention back on it! Gullible consumer that I am!
Experiment # 3 -- Grow To Show Comparison
Experiment # 3 will be two plants of Optimara Trinidad growing side by side... one will be on a Grow To Show fertilizing/disbudding/lighting schedule, and the other will be allowed to grow and bloom as it wishes. These two plants had some problems with my acidic rain water, and I also noticed they are growing a bit too 'open and loose' for what I expected. I think they were grown too warm????!!! And have moved them, when I put the show plant on it's special schedule yesterday.

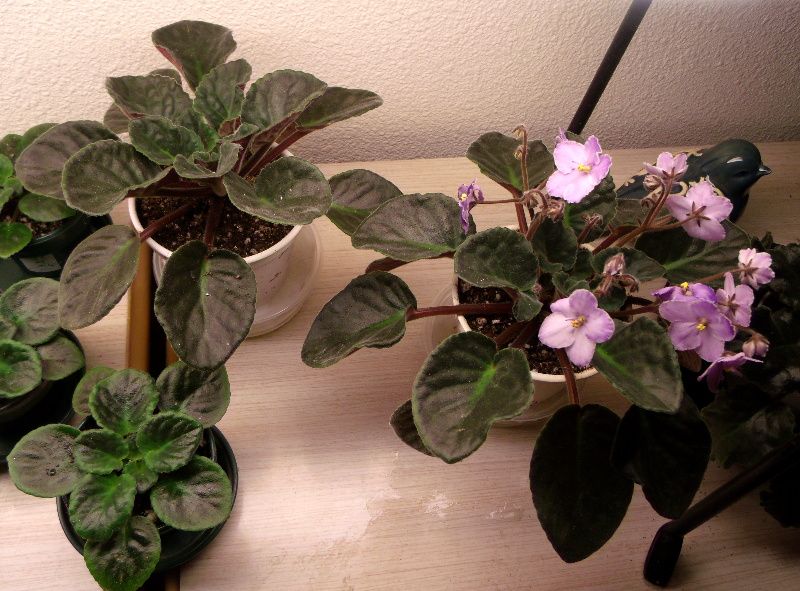
Both were potted up into a very slightly larger pot with fresh mix, and are on my self-made felt self waterers. I found these waterers made caring for show plants, especially as they grew larger, much easier.
Experiment # 2 -- Watering Methods
Experiment #2 is a Watering Methods Comparison: Four plants of no-name double pink (supposed to be Saint Paul, and looks to be some other unknown Harrington variety), all planted in my usual mix of 1 1/2 parts peat moss, 1 part vermiculite, 1 part perlite.
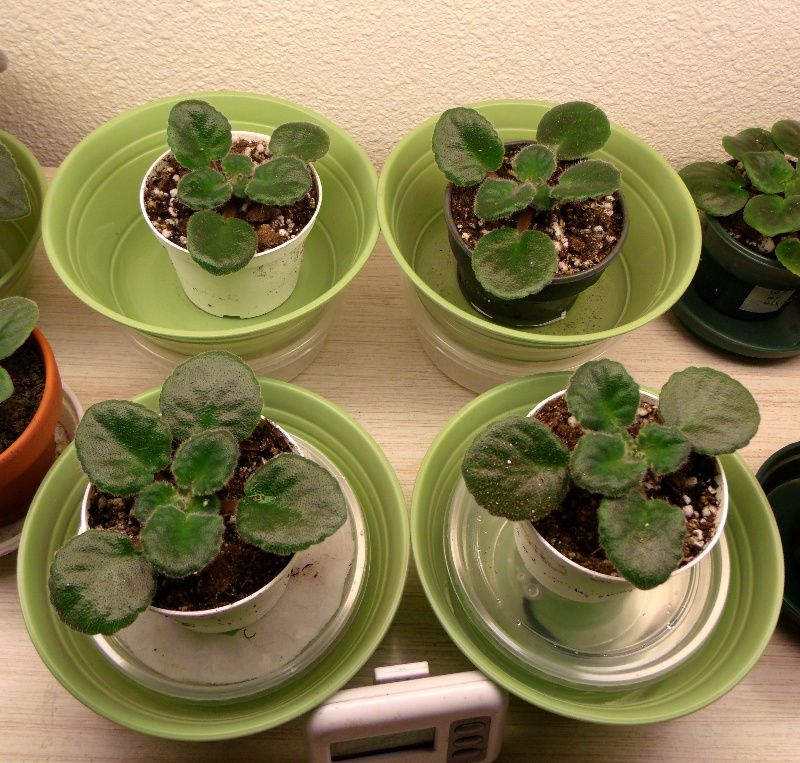
The top left is planted in a plastic pot, and will be watered from the bottom. The top right plant is potted true Texas Style, and will be watered with 'Visual Replacement', ie: when the water level in saucer is gone, slight 1/4 to 1/2 inch will be added.
Bottom left is on a self-water that I made, with felt as the 'wick'. Bottom right is also potted in my usual mix, with a piece of acrylic yarn through the pot and into the watering reservoir.
NOTE: I did not change my 'usual soil recipe' to use with the acrylic wick! ?????
Subscribe to:
Posts (Atom)