Showing posts with label African violets. Show all posts

February 7, 2015

February Blossoms!

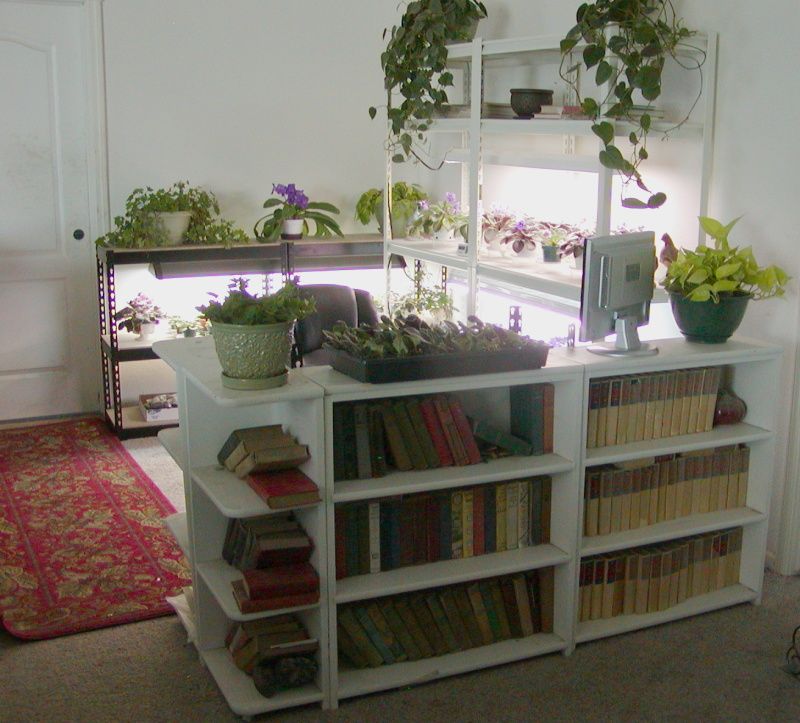
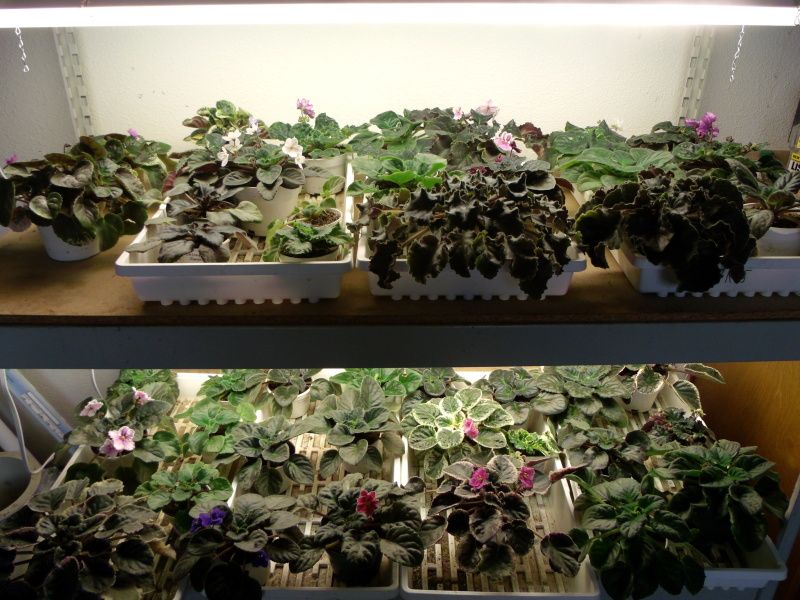
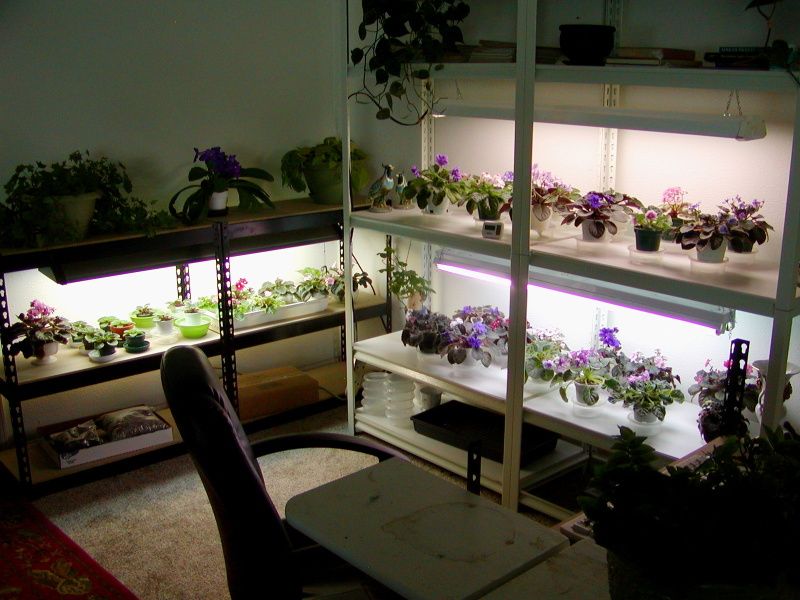
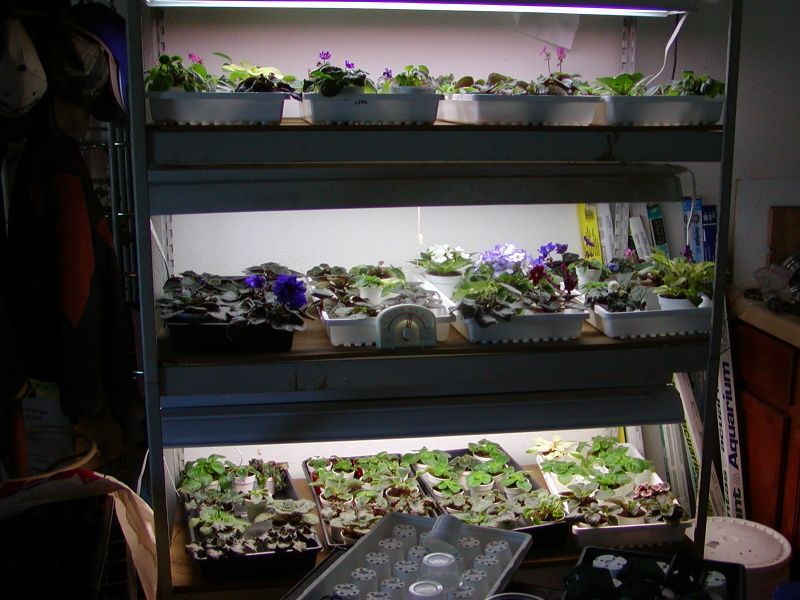
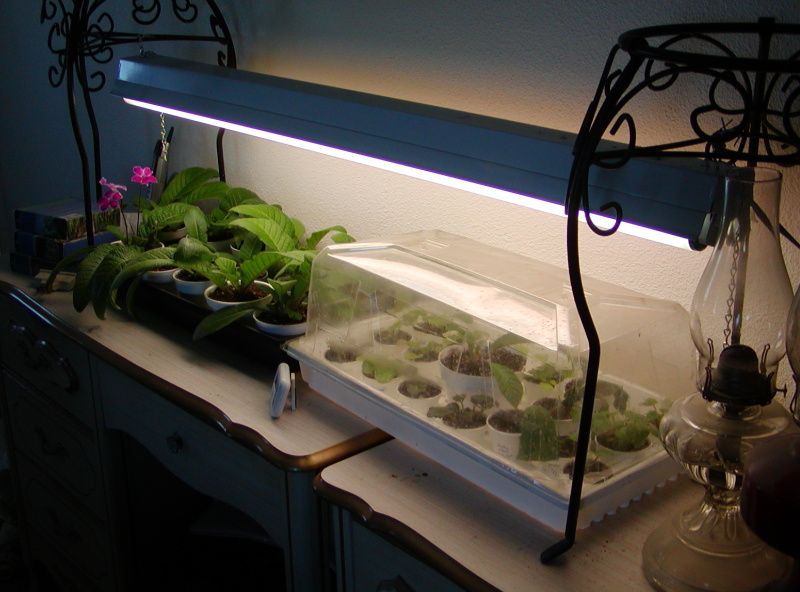
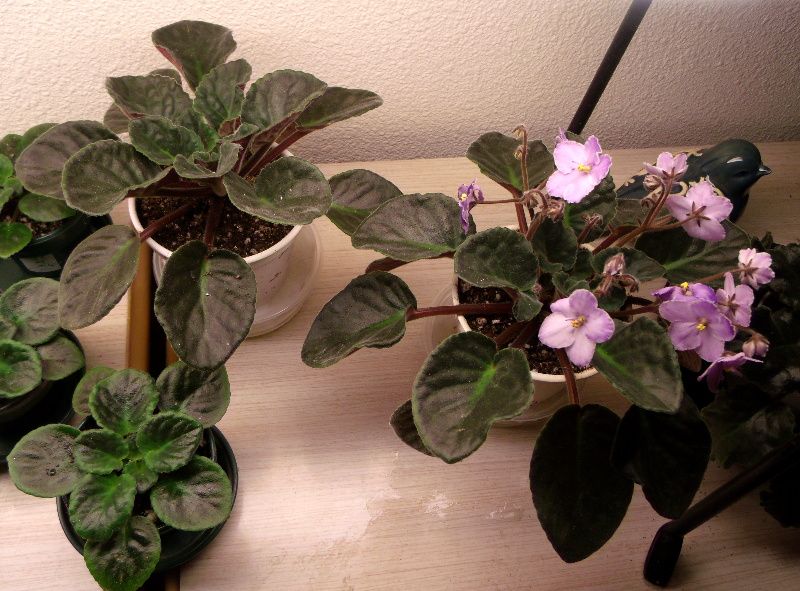
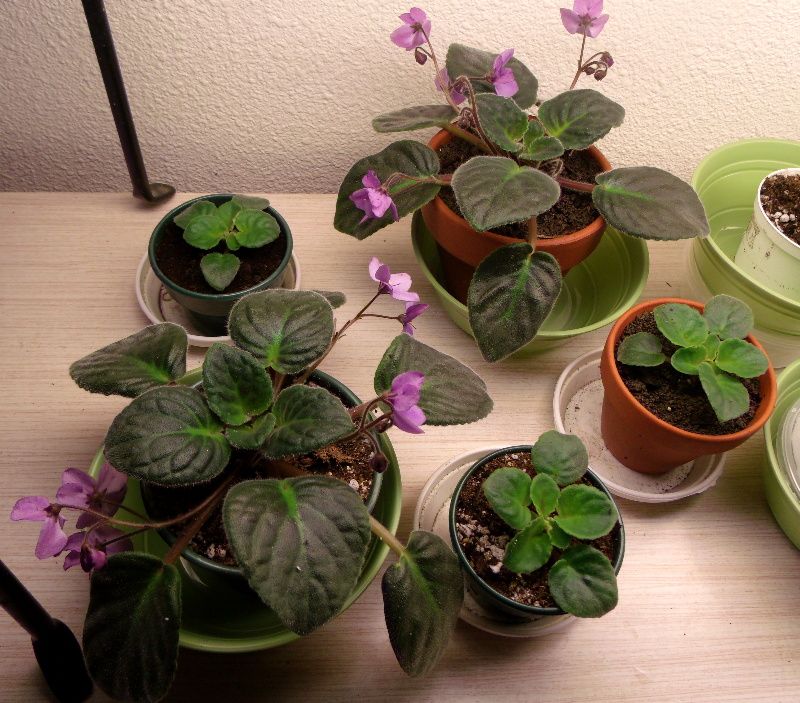
Just had to share the BEAUTY that sits at my elbow while I am on the computer!
Most of these are plants I ordered from Violet Barn last October,
and they are still in the little pot they sent them in!!!!
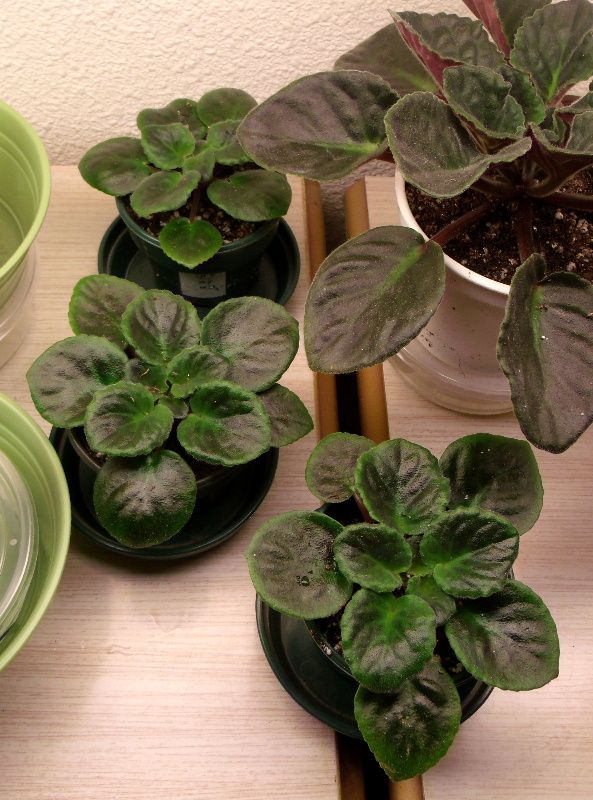
These are a few young plantlets just coming into their first bloom!
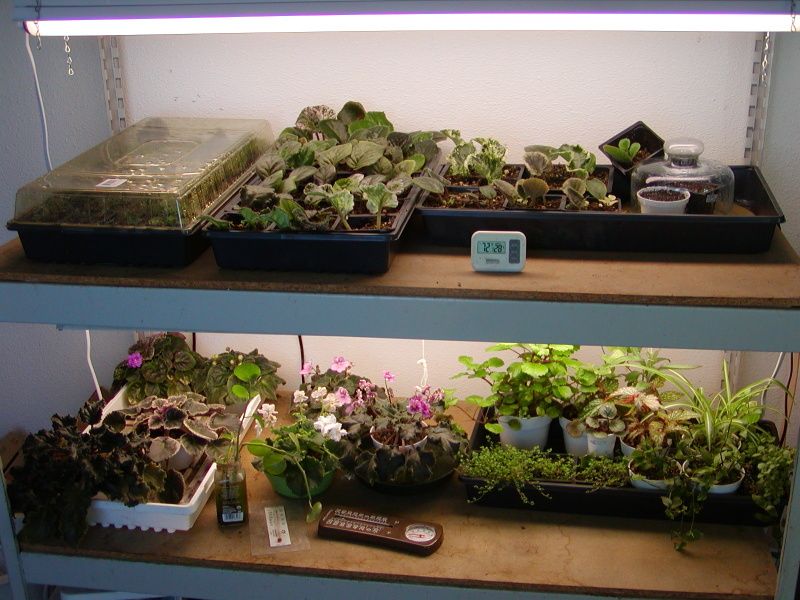
I have about 200 of these - in 121 varieties!  Yikes
I AM trying to 'limit my collection'!
REALLY!!!

June 14, 2013

Excellence in African Violets

I LOVED this article! There were many things mentioned in the article that I do as part of 'Trusted Routine', and that I think are very important! :)

"In Search of Excellence" by Betty Tapping. Betty has been a long-time member and friend of Lakeshore African Violet Society. Although she has retired from growing African violets she still keeps up her connections with our society and still lives in our community. This article will help growers achieve excellence in their plants with tips from Betty, an excellent grower and exhibitor of African violets.

This article has all the basics, although they aren't laid out as 1, 2, and 3.
Do what Betty says, and you will have nice show-quality plants AND also be organized and neat!!!

The article is deceptively simple, and you might overlook these important things!  So, allow me to give you a guided tour of the article!

First paragraph:  Betty learn from others' wisdom, but allow yourself to experiment and learn from your mistakes!  I would put this first in my article also:  Learning, the easy way from someone else, or the hard way by trial and error, is the FUN of this African violet hobby!

Next in the article, Betty explains she always has plants at various stages of growth:  from leaf pots with babies, young starters, mid sized pots, and larger show plants.  This lets her use her space better.  I agree!!!!  This is one way I can list 149 varieties I have in my house, and have at least three plants of each variety!  I do this!!!!

Betty says pot size is important.  To me, pot size used is VERY important.  Some varieties have smaller root systems, and thrive better in smaller pots.  And pot size is most important in very small babies as you transplant from the mama leaf and again when the plant is mature such as more than 18 months old.  I have certain pots that are shaped and sized just right, and if I have a small baby of a tempermental variety, I always put them in my 'good pots'!

"Some plants do perform better than others."  NOTE THIS!  Many people say:  my violet isn't blooming.  The first thing I want to know is the variety name. Sometimes it is a plant that takes longer to rebloom, or doesn't do as well in windowlight, or high temperatures.  Some hybrids will do better than others.  Read Betty's paragraph in the article.

I could go on and on.... each point in the article is a good one.  Each sentence had something that I found made African violet growing easier, better, or more fun!

March 12, 2013

The Seed Show was fun!

I had lots of fun with my violets at the Montana Seed Show held in Harlem!

January 13, 2013

Mature Plant Care

I have received questions from people who purchased AV plants, new to African violets.... and the most common one is: "Why do you say 'Repot twice a year'?"  I do think this is one of the best ways for novice growers to keep their plants happy and blooming.

Notice, I did not say:  Pot UP!  I said 'repot'.  The purpose of this 'repotting' is to give the plant 'fresh' potting mix, and room to grow.  A pot full of roots doesn't leave room for new growth, and I am a firm believer in the theory that root growth leads to top/crown growth, and that brings on the blossom stalks. (For some details on the 'root' subject, read the Class One notes of my House Plant Class.)

You do not have to put the plant in a LARGER pot, but please use a clean pot.

Here is a mature, 18 month old, plant of Ness' Fantasy Gold.  This variety tends to grow leggy... the leaf stems are quite long.  This particular plant has been pretty well shaped, with healthy leaves!  But it needed repotting.  The date on the labels said it had been repotted in August, 2012.
'Before' photo:

I took several layers of leaves off.... and then took the plant out of the pot.  I rubbed off much of the soil mix, expecially at the surface of the root ball.  Then, I held it in the new pot (the same size as the old pot).  I wanted to bury the 'bare trunk' which appeared after I took off the lower older leaves. So, I rubbed, vigorously, more dirt off the bottom of the root ball.  You can simply cut off a half inch to inch of the bottom, but the soil mix was loose, and there didn't seem to be many roots in the bottom bit of the rootball, so I just rubbed the excess soil off.


Then I set it in the new pot, filled in with fresh soil mix, tapping on the table to settle the dirt into the open spots in the rootball.  I topped off the pot with a layer of new mix, then pressed down slightly.  Please do NOT pack the soil mix when repotting African violets.  Press firmly, but not too much!
Here is an 'after' photo.

I did not remove flower stalks.... this is not a 'grown to show' plant, and I can enjoy the blooms.  The purpose of removing flower stalks is to put the plant's energy into growing foliage, and in this case, the plant has ample foliage, and it will bloom nicely while/after it is growng new roots into the fresh soil mix in the new pot!

Note, we made room for new potting mix in the same sized pot by reducing both the top and bottom size of the plant.  Personally, I would not cut off part of the root ball without also taking off a few leaves.  Remember, the roots supply the leaves with moisture... a reduced root system might not be able to keep a large crown healthy.

Your first impulse might have been to put the violet into a pot larger than the one it was in.  Many times you can do this... and you could have done so in this case. 

If the plant is younger than a year, and in a pot smaller than 4 inches, I would 'pot up' into a larger pot.  If the plant is in a 4 to 6 inch pot, I would recommend potting into the same size pot, as I did above.

(Remember, pot size depends upon the type of soil mix, the way you water, how much attention you give your violets, your house conditions, and your past experience.  If your violets like what you are doing, don't change it just because I do something different!)

January 10, 2013

Leaf Pruning Babies!

Many people mention root pruning (cutting off the bottom of the root ball when repotting).  Growers tending show violets will train leaves to put them in the right position, disbud (remove buds and blossom stalks), and prune to remove leaves with damage or to give space for the center leaves to grow.

I leaf prune very small babies!  I did it without thinking... and was nearly done with the tray of babies this morning when I thought:  I wonder if anyone knows about this this?  I consider it very important, and should explain exactly what I mean.

Why take tiny leaves off very young plants with only a few leaves to begin with!!!????
Left are two young babies of Ma's Second Thoughts.
They were very small but strong, with lots of roots, and I want to hurry them up, and the mama leaf was removed when I had the mildew episode, so I gently pulled them apart.

Notice the leaf hanging off to the right on the plant on the right.

Notice the leaf on the left on the plant on the left.

I removed both of these, because they were below the main crown/growing center.  The other leaves of each baby basically came out together with each other.

Yes, I know the leaves on a mature African violet come out at different levels along the trunk of the plant.
However, in this case, if you set the baby in the soil mix at a level even with the main growing point where most of the leaves came out, you would be burying most of the bottom leaf's stem and the point where it comes out of the baby's trunk.  This would most definitely cause more suckering, or even that leaf producing babies at the point where it meets the main trunk, or along the stem.  I almost always have terrible and prolonged troubles with suckering when I bury the base of a leaf!
If I set the baby in the soil mix at a level where the bottom leaf comes off the trunk, you have already given the baby an 'old lady' trunk. New leaves won't come from this bare trunk... and the next time you potted up this plant, you would end up removing this leaf and burying the trunk.  Plus, I have seen suckering in this situation also.
 

Taking Babies From Mama Leaf -- How To

Here is how I transplant babies from an African violet 'mama' leaf.  Note, I say 'transplanting' babies from mama leaf, and I say 'potting up' babies when they have outgrown this first pot and need to be moved 'up' to a larger pot.  Some say pota-toe, some say pat-tato.

I have found one good way to start and that makes seperating and planting a tray of babies quick and easy.  Start right and you will end up happy. 
  • Begin with labels and a waterproof marker.  Use labels or tape pieces with permanent adhesive.
  • Have small pots in many sizes stacked right there.  It is easy to use a pot that is too small or too large when there are lots of pots there, but none of the correct size. 
    PUTTING THE BABIES IN THE RIGHT SIZE POT IS important. 
    I like to use a pot with the volume of soil mix about three times the amount of roots.  You can just guess... it isn't an exact science.  Don't go by the size of the crown/top. 
    *** If you put small babies in small pots, and larger babies with larger root systems in larger pots, you will be able to just pour water in the tray and leave them drink up for a half hour, without worry about over or under watering.  The larger amount of soil mix will soak up more water, which is needed by the larger baby, and the smaller pots will soak up less and you will be less likely to drown the smaller, slower growing babies.  This way I can put many babies of different sizes, varieties, and rate of growth in the same tray, and for the next two months, they will not need individual attention!
  • Have water, with fertilizer/additives, ready.  Do you have enough soil mix?  Have a clean tray with dome standing ready.
Left, is a photo of my table this morning. At the top of the photo, is my tray of mama leaves, as well as two square cell packs on the table.
On the right is a sheet of labels and marker.
I just potted up two babies.  The 'discard' pile is near the tip of the pen.
Out of sight on the left, is a green Rubbermaid tub of potting mix.  Out of sight on the right, is a tray waiting for the baby pots.


Here is a mama leaf of Splendiferous, with the clump of babies.


Just 'tease' apart the clump. First I pull the mama leaf away, and the two smallest not yet mature babies came with her.  There are six other babies.
The two smallest, not yet mature babies, came with her (on right). These I would discard unless the leaf was a rare or expensive one.
In the middle, are three small babies, and the largest babies are at the bottom.
The baby on the bottom right has the best potential for shape, root size, and number of leaves.  It also was the first to reach this size, and it may also have a bit extra vitality.
I had decided to limit the number of babies so had chosen four as a good number of each variety, as four pots fit across the tray, making one row for each variety.  :)
Of the above babies, I chose the two on the right on the bottom row. and the two on left of the top row.  NOTE:  The baby on the left on the bottom, while having five leaves, had a funny looking crown.  It may have grown up to grow normally, but since I had the two strong ones above.  Although smaller, they were naturally better shaped. :)
Sort of feel like I am an over-demanding soccer mother, expecting them to do better than normal even when young!  :)
 
When the tray was full, I soaked the pots with water containing a small amount of Neptune's Harvest Seaweed Plant Food, and a dilute measure of Jack's Classic 20-20-20. 
I have been re-reading AVMagazines from 2005 and 7, and at that time, it seemed everyone was using seaweed extract when rooting leaves and planting babies.  So, I decided to try it on this tray!
P.S.  I did measure the Seaweed and the Jack's Classic!  And wrote it down.  If it works well, I want to be able to duplicate it!  If it does harm, the amounts may help discover why!

January 6, 2013

Update on MILDEW

Update on the mildew problem:
As expected, correcting the cause was the saving of the situation!
But from past experiences, I knew that simply creating a good mildew-free environment wouldn't completely eliminate the problem since the powdery mildew spores were still floating around.
So, I misted the Lysol over most of the growing areas every three days.  I did mist my 'mama' mature and blooming plants once, very lightly, after removing all open blossoms that would have the most probability of having unseen mildew on the backsides. The leaf trays and streps also were misted.

The tray of babies that was so badly infected/affected were left so that I could see what the milk/clove oil/water combo did.  I sure hated to take a chance, but since I have been in an 'experiement' mood this winter (thanks again, Laurie!) I just had to.

Ten days later, and there was no return of mildew.. and yes, I did put on my glasses! In the past, it often returned in five days to one week.  So on the eleventh day, I misted the leaf tray and the Maverick's Faded Jeans plant with the Lysol.

The mildew did leave it's 'mark'... some of the leaves on plants most often touched developed brown marks or brownish tints.  I read somewhere that the mildew actually enters the leaf and feeds on the plant's cells.  Kill the mildew and it will stop doing more damage, but any cell damaged will die or show stress.

Anyway, now that my canary hen hatched several baby chicks, I have to be careful with the Lysol spray... the smell drifted throughout our house since several of my violet stands are in the open living areas.  Cautions include dangers to household pets, including birds.  So, I will continue to mist the sales plants with the Lysol on a schedule, in another room with an exhaust fan going and the door closed.  But my personal plants in our living areas will get the milk treatment.

December 30, 2012

Time to order Seed Catalogs....

.. and watch the African violet vendor websites for announcements of 2013 plant lists!!!!!
Yippee!    Thoughts of green grass, garden flowers, and fresh salads help us deal with piles of snow and cold winds!

December 19, 2012

My new Violet Corner -- unfinished

My new violet corner is not finished... not by a long way, but I just had to take a photo!  :)
 
A Few STATISTICS:
I have 178 individual African violet plants, and 18 strep plants.
Approx. 65 are my 'personal collection' plants, with the rest as duplicate plants to either sell or give away.
I have about 1/3 of my plants potted up, and all the extras are potted up into at least 3 inch pots.  If I can finish repotting my personal plants, I will be all ready to begin transplanting babies from mama leaves.
Oh, yeah.... I have 140+ leaves set.  :)
Now to compare my AVs from October to my AVs now.
Below, is a photo of my personal collection of plants... the ones I am keeping for myself, taken in October when they were on two shelves on my bathroom stand.
Two months later, here they are on the stand in my new violet corner:
Here are the extras and for sale ones in the porch:
The streps and a few young av rooted suckers in the bedroom:
Last, the stand in the bathroom has the most recently planted leaves, foliage plants, and etc.:


December 17, 2012

Mildew Rears It's Ugly Head!

Okay... I've finally admitted I have to TREAT powdery mildew!!!  For the past two weeks, since we started the wood stove and the house temps have changed, I have been noticing a few blossom stalks on larger plants on one stand had mildew on the stems and some on the petals.  I DID NOT find any mildew on the other stand in a different area!  :) 
     So, I began TREATMENT with the only true first step:  PREVENTION!  I took off all stalks with open blossoms... and moved the plants to a better area!  The temps in the new area don't drop so low at night, and the difference between night and day temps is not so large.  This new area is one side of our living room, and we walk by the violets many times every day, creating a little 'stirring' of the air.
     That was two weeks ago, and I have not seen any sign of mildew  I will keep a close watch but I expect not to have much problem.
     The original shelves where the mildew developed are in the bathroom.  It is a large bathroom, and we do run a fan for several hours a day, and there is not high humidity.  The problem is that it is an 'isolated' room, on the outside wall, and several rooms away from the wood stove.  When the wood stove is stoked and working, the main furnace does not run, and yet the heat from the wood stove does not warm the bathroom.  We use a small heater/fan for those times we use the shower, so the daytime temps aren't too bad, about 66-72 degrees.  But the night temps often drop to 60 degrees.
     Today, I noticed the oldest tray of mama leaves had a well-advanced case of MILDEW!!   Yuk! I was checking on them nearly every day, but they were growing at the pace that a watched pot boils!  So, I decided to let them be for a few days.  So, I missed the first signs, if it came slowly.  It could have developed in the last week, since I watered them a week ago, but I didn't look too closely!
     I did a quick check on the new stand, and the large plants were free.  I looked over the stand that has the 'extras' and for sale plants.  They are in a good environment similar to the new stands,and I have been misting the area with Lysol spray, just to keep the selling plants clean.  It seems to have done a good job.
     But those propagating leaves were horrid, and needed quick help.  I did some research in the violet books, and Nancy's book, etc.  I decided not to rely on the Neem Oil as it seemed it worked best for prevention.  I didn't have the stronger chemicals... so went to work with what I had.
     I have had good results with simply washing the mildew off on a very regular basis, keeping the shelves and area clean, the Lysol spray, and improving the growing environment.  So, I mixed a milk/water/clove oil solution, and began to brush it THOROUGHLY over all the mama leaf surfaces.  I did not brush the baby leaves... except those in the front three pots in the photo below.  Just for an experiment!  :)
     I mean I REALLY COVERED and saturated the leaf surfaces,  It wasn't easy, as the hairy leaves, and the mildew itself seemed to shed the solution.  I did remove some leaf tips, and some mama leaves completely, if the babies were large and looked sturdy.
     I did find one medium plant with some mildew on the blossom stalks and one leaf.  So, I completely covered it.
     The leaves and plant  dried very quickly as I did the work very close to the wood stove and the fan on the stove does move air!  I left the leaves and plant in the kitchen for the rest of the day, and will place them in a place that has more even temperatures and good air circulation.
    Tomorrow, I will wash and spray the bathroom shelves and give everything a light misting just to keep them safe.  Plus, I will double check day/night temps, and make sure it isn't the best mildew environment.
     Here are photos:
Here are the leaves and plant after treatment. 
The solution was mixed as:
  • 16 tablespoons of warm water
  • 4 tablespoons of milk (whole, raw)
  • 16 shaken drops of clove oil (essential homopathic oil, not culinary)

December 6, 2012

Experiment # 4 -- Soil Mix Additions

Experiment #4 is a Soil Mix Additions Comparison.  I chose three small plants of Optimara Bora Bora. All plastic pots to be bottom watered with saucer.


The middle pot has my regular mix of 1 1/2 parts peat moss, 1 part vermiculite, 1 part perlite. The bottom pot has 1/2 my potting mix and 1/2 soil (loam). The top pot has my potting mix with 1/4 part of Happy Frog Soil Conditioner.
The amount of the soil conditioner is not much, but it tested a bit high in ph, and it's purpose was to add just a bit of soil microbe activity, which since I am using 'artificial' mineral fertilizers instead of ones with organic source origins, I really don't know if this all matters!  :)   But I fell in love with the romance of the idea of all the yummy sounding ingredients in the soil conditioner.  It was the only bag of 'peat moss type thing' at the hardware store, so it kept focusing my attention back on it!  Gullible consumer that I am!

Experiment # 3 -- Grow To Show Comparison

Experiment # 3 will be two plants of Optimara Trinidad growing side by side... one will be on a Grow To Show fertilizing/disbudding/lighting schedule, and the other will be allowed to grow and bloom as it wishes.  These two plants had some problems with my acidic rain water, and I also noticed they are growing a bit too 'open and loose' for what I expected.  I think they were grown too warm????!!!  And have moved them, when I put the show plant on it's special schedule yesterday.
 
Both were potted up into a very slightly larger pot with fresh mix, and are on my self-made felt self waterers.  I found these waterers made caring for show plants, especially as they grew larger, much easier.

Experiment # 2 -- Watering Methods

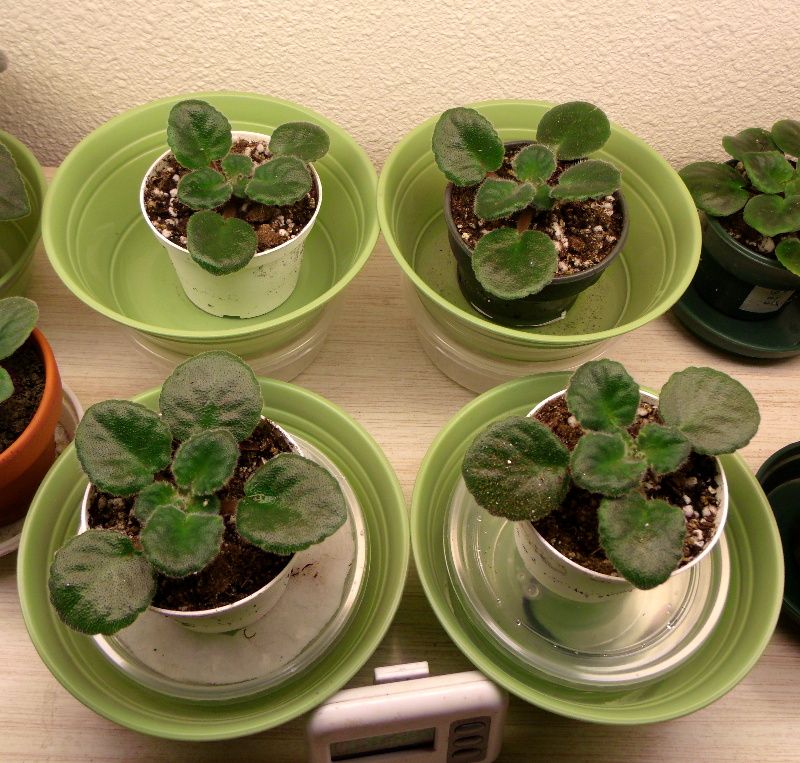
Experiment #2 is a Watering Methods Comparison: Four plants of no-name double pink (supposed to be Saint Paul, and looks to be some other unknown Harrington variety), all planted in my usual mix of 1 1/2 parts peat moss, 1 part vermiculite, 1 part perlite.
The top left is planted in a plastic pot, and will be watered from the bottom. The top right plant is potted true Texas Style, and will be watered with 'Visual Replacement', ie: when the water level in saucer is gone, slight 1/4 to 1/2 inch will be added.
Bottom left is on a self-water that I made, with felt as the 'wick'. Bottom right is also potted in my usual mix, with a piece of acrylic yarn through the pot and into the watering reservoir.
 
NOTE:  I did not change my 'usual soil recipe' to use with the acrylic wick!  ?????

Experiment # 1a and #1b -- Soil versus Soil-less

Comparing two methods of pot/soil combinations:  the old-fashioned ( and my mom's much preferred) method of good soil (loam) in a clay pot  -- versus --  the modern ( and my usual) method of soil-less medium in a plastic pot.  Both will be bottom watered with a bowl.
Experiment #1a :    Two large plants are Amethyst, which is one of the Original Ten African violet varieties introduced in 1957, which I thought proper to use in an 'old-fashioned' experiment! 
Experiment #1b:     Three small plants of Ness' Cranberry Lace, with the third pot in upper left containing Miracle Gro African Violet Potting Mix.

I used 'garden dirt' rather than the good virgin soil that my mom recommends, simply for the fact that it is not a good time to go exploring for gopher mounds in virgin pastures!  If the ground isn't covered by ice, it is sloppy muddy, and mostly frozen.  So, I used a bit of the soil I have saved in a bucket for use in the spring while potting up veggie transplants.  It is good soil, with good structure, but may include some pathogens, etc. and of course may be lower in fertility and humus content because it was 'used' this summer.

The soil-less mix is my usual 1 1/2 part peat moss, 1 part vermiculite, 1 part perlite.

I had bought the bag of Miracle Gro AV mix for the house plant class, and decided to give it a test!

December 2, 2012

Water --- now it's okay!

It rained this week!  And I filled jugs for houseplant watering... after testing the ph and TDS.  The ph was 7 and the TDS was 67.  I am back in business!  :)

I have been watering my violets with distilled water and no fertilizer.  So far, every plant has been watered twice with distilled water.  I will water one more time and then flush the pots of all my 'mature mamas' and repot all the starters and small babies.  They are ready to be potted up and this will fit in with my 'remedial' soil training!  :)

I had a busy week , with the houseplant class, getting our food co-op delivery, buying and trading goats, getting canaries, displaying my art at the local library, moving cows from summer pasture, having snow storms, selling violets, etc.  etc.  AND I have not yet repotted the 'ph affected' violets.
Their symptoms have not worsened, and they look like they are doing fine, while they wait for me!

This week is somewhat 'less crowded'.... we are taking several work-related road trips, and will be weaning the calves (taking them away from the cows), and will be picking up the artwork, plus hosting the last night of class.

November 25, 2012

Interesting Water and Soil Tests -- Updated

I received the TDS meter today, so began to test various waters and combos with soil:
(P.S. by the way, the federal standards for safe human drinking water is no more than 400 ppm TDS)
UPDATED test list

source of water                            ph                    TDS

WATER TESTS

Mom's spring water                       7.5                 411 ppm
our well water                               7.5               1466 ppm
our well water after Berkley filter    7.5               1466 ppm

rain water in October                    6.5                 109 ppm
rain water in November                  4                    84 ppm
yet to test:
Harlem city water
Dodson city water
bottled spring water
bottled distilled water

SOIL TESTS

In October:
1 cup distilled water (7 ph)
ran two times through 4 inch pot of
freshly mixed soil                        5.5                did not test

In November:
1 cup of Mom's water (7.5 ph)
ran two times through 4 inch pot of
> potting mix                                5                  did not test
> Splendiferous plant displaying symptoms
                                                  4 or lower        751 ppm

tests comparing soil ingredients and mixes:

1 cup Mom's water (7.5 ph)
ran two times through 4 inch pot of

Miracle Gro AV Soil                  4
Glacier Gold Compost                5
my potting mix                            6
a plant from my friend (different mix) 4
FERTILIZER TESTS

November rain water (4 ph) with
1/4 strength Jack's Classic 20-20-20
                                                  5                   did not test

Mom's spring water (7.5 ph) with
Neptune's Harvest
> very dilute Liquid Seaweed 0-0.1-1
                                               7 or 7.5            did not test
> very dilute Fish Fertilizer 2-4-1
                                               4 or lower         did not test
powdered super phosphate      3.5

Jack's Classic 20-20-20          6.5
Schultz AV                              6.5
Dyna Gro 7-9-5                      4.5
Dyna Bloom 3-12-6                3.5
AlgoFlash 7-9-5                       4
WOOD ASH TESTS

concentrated WA solution:
1 tsp cottonwood ash per 8 oz. mom's spring water (7.5 ph)
ph tested way off the chart so not included because I couldn't
figure accurately.

November rain water (4 ph) with
> 1 TB WA solution per 4 oz.      7.5
> 1 TB + 2 tsp  per 4 oz.             10. + very purple (past blue?)

Poured 1 cup of 1 TB WA per 4 oz.
over 4 inch pot of potting mix      6.5

wood ash test below (Note the test tube is purple... but not the 'red' on the acid end of the color chart, but blue-purple of the other end, or off the other end!)


I did the wood ash tests after reading all I could find in 'modern' books and online about adjusting soil ph in pots and while mixing soil.  All mentioned limestone, lime, etc.   Brief mentions of wood ash were included as part of an 'etc.' listing.  I didn't have any lime, and am not going to town.  So, I decided to read the old AV and gardening books, and came up with the above concentrate solution that was used for outdoor use.  I will test the concentrate Wood Ash solution in a day or two and see how it changes.

I was surprised at the very acidic ph of the mixed fish fertilizer!  Good thing I tested it! 
Now I am wondering about the other fertilizers that I take for granted!  When I have lots of  'good' water, I have more testing to do!  (My bottle of test solution was for 'indefinite tests, ample for typical gardener'! Do you think I am typical???)

I just tested the other fertilizers I have used or plan on using on my violets.  I was surprised at the acid effect of the two Dyna formulas.  Also the AlgoFlash which is the fertilizer I used on my greenhouse plants this past spring.

WHAT I AM PLANNING:
I will get 'good' water in a day or two.  In the meantime, I have one gallon of the October rainwater that tests with an okay ph.  If any violet needs watering in the next day or two, I will have that.

I found three violets, including the Splendiferous, that show symptoms of limp, yellowing or dying older leaves, with some possible root damage (ie:  soil mix in pot staying damp longer than normal)  These three are blooming fine, but overall plant vigor is slowing, leaf and blossom stems are stiff and darker colored, backs of leaves showing some degree of purple coloring, and center young leaves are very slightly twisted and tight.

These three plants will get 'flushed' with Mom's spring water and a small amount of the Wood Ash concentrate.  I will pour the water through the pot.  Then I will set the pots on a bath towel, which seems to always soak lots of water from the pot.

Before and after photos will be taken, I hope!  :)

November 24, 2012

Thoughts on PH, Water, Soil, and Tiger Trail

Update.... after researching in Robey's book, several horticultural botany books, etc...
I tested my water, again!

Last month, I ran about a dozen tests, on the various water sources I have such as city water, bottled water, distilled water, our well water, my mom's spring water, and the water from my rain barrels.  Simply:  all local water was slightly alkaline, and the bottled water was slightly acidic.  The distilled water was as close to neutral as my cheap-o test kit can show.
I tested my soil mix, using the distilled water, and running it through a small pot, then testing the saucer water.  It was slightly acidic, bordering a bit toward the worrisome.  But since my water was alkaline, and I have used this basic soil recipe (from the same bulk bags of peat, vermiculite, and perlite) for the past 18 months, and had no real problems, I decided to assume, as I have in the past, THAT ANY INCLINATION TOWARD ACIDIC SOIL WOULD BE COUNTERBALANCED BY THE ALKALINE WATER.
We got a small rainfall, and so I filled all 35 gallon jugs from the rain barrels... before the water froze solid!  :)
(I don't mind if they freeze, I simply bring them indoors during the winter and let them thaw in the tub!  Instant water! )

After noticing Tiger Trail's leaves were purple underneath, I took a closer look at all my violets.
I found:
  • bloom colors more intense generally, with some varieties/plants having blossoms more solid than normal
  • some plants had leaves that were a bit thinner than normal, with discoloration on leaf tips sometimes leading to dying leaf tips
  • 1/3 of the plants had leaves with pink/purple undersides (entire undersides were tinted purple)
  • general impression that oldest leaves beginning to look 'tired' or 'dusty'
  • center leaves a bit too tight and twisted (as I have seen with too much light)
OKAY:  I thought the plants with 'dying tips' may have been the ones that went through single digit temps to the houseplant class!  :(  They would be expected to have some side effects of a 'night on the town'!  :)
And they are all effected.... but I noticed several others that stayed home just beginning to show the same effect.  ????

As for the bloom colors, I have a different combination of light bulbs in my fixtures than usual.  I used one white and one cool for years, then switched to one GroLux and one cool in more recent years.  THIS FALL, I had problems finding any T12 tubes... finding only 'Kitchen/Bath' and 'Daylight', which I decided would be close to the original warm/cool combo.  The fine print on the tube packaging didn't quite match up the old combination, but I decided it was worth a try.  I DO KNOW that BULB TYPE/COLOR does make a difference in the appearance of an African violet bloom under the lights, and in the Grow to Show book, it was written that actual bloom color might be affected as well.????

I also added new BRIGHT light tubes... at least one to every fixture.  And to get as many plants in my space, I have three shelves arranged on my metal shelving units, so the fixtures are normal or closer than normal above my plants.  Maybe a bit too much light????

Reading about Acid vs Alkaline, I discovered that the micronutrients are used more easily at acidic conditions, and decreases the uptake of the three macronutrients. 

Looked at TT closely, and other violets and concluded I needed to do yet another water test!
I tested the water with fertilizer added, and found it was slightly on the acidic scale... today will do a 'runoff water' test with the plant most obviously showing signs.

CONCLUSION:  no real danger yet.... nothing that cannot be corrected.  May have to retest my tub of potting mix, just to see if it has changed after setting.  I did test it a day after mixing, and the 'rules' say to wait a few weeks!  :(   I will also retest my rain water... maybe the recent rainfall was more acidic.
I will use town water or some other more alkaline water, and I will alternate basic Neptune's Harvest fish fertilizer with plain water for a month.  Neptune's does not have added micronutrients... while my other brand of fish emulsion has added elements.
If my tub of potting mix is more acidic than normal, I will remix with new bags of peat, vermiculite and perlite.  I am near the bottom of them anyway, and will use this mix with spring's veggie/flower seedlings.
I will set the light timer to an hour less light.

P.S.  also sent for a  TDS meter... Total Dissolved Solids are in recent literature as having as much to do with plant growth as ph.
P.P.S.  will also set up our Berkley filter again.  We used it after the spring flood was so high and long lasting.  It will be interesting to see if the cheap ph and TDS tests show any real difference in our well water before and after filtering!!???

November 19, 2012

House Plant Class notes are online

Night One of the House Plant Class went fine... with only two 'students'!  :(  Several others could not attend that night, but are hoping to show up for night two.   Well, it is nearing holiday time... and people are just about 'feed up' with keeping outdoor plants alive  all summer, and are happy to be free of something needing watering!  :)    I UNDERSTAND!  If it wasn't for my addiction to African violets, I would be turning to tatting and crocheting for the winter!  :)
The Adult Ed program director wants to schedule another class in March.
We did have fun at the first night!  With so few of us, we were like a group of friends talking about our favorite plants!  :)  Everyone told some interesting or funny 'houseplant' stories, and we learned all about everyone's windows and favorite plants... problems and worries, too!

Night One Notes are online!

Special thanks to Loxi, for helping with the questions, and telling us how much she likes her cyclamen and how to grow it!  Loxi is my 'violet friend' and we have had much fun over the years swapping violets and tales of  'this one and that one'!

November 17, 2012

Tiger Trail questions

Regarding a question by Laurie on her blog:  Curiosity of Variegation

I have had this happen before, in years past.  I have not yet found a reason why.
The resulting 'pink babies' look similar to photos of Ellie Gardner, registered by the same hybridizer the year after Tiger Trail.  But they were not the same as a starter plant of Ellie Gardner.  (I did not have Ellie Gardner long, as that is the time that I discovered a thrips infestation and the plant was eventually tossed.)

After Laurie's questions, I photo'd my Tiger Trail plants, and discovered the newest growth was 'turning red'.  The leaf backs were red on the youngest leaves and the top side of the leaf had smaller specks of pinkish variegation.

Photo of typical Tiger Trail (2003) in window light:


Photo of Tiger Trail 2 years ago (2009):
typical look... maybe a bit overall bluish cast to the whole photo... Under plant light

Photos of Tiger Trail today 11/17/2012):  plants resulting from leaf of plant above:
Note older leaf (lower leaf) is white backed, and the newer (upper) leaf is reddish backed.
Also, note the newest growth in the crown facing the camera.  It has smaller specks of pinkish variegaton rather than the larger splotches of white that is seen in the older leaves.

A second 2012 plant:

Note that there is the same difference between the backs on the older leaf and a newer leaf.
Both 2012 plants are under lights when these photos were taken.
Next, photos of my Tiger Trail leaves that are just beginning to sprout:
The three groups of baby leaves are TT, the three leaves you see with variegation are TT.
This is about normal appearance... possibly quite thick stems?  But my house is cool right now, and I notice sprouting babies are 'stalkier' in cooler temps.
Since setting these leaves 9/13/ I think I have only watered them once or twice, since they have been under a dome until a few days ago.

WHAT'S GOING ON???
I did change fertilizers since the early years, and prior to 2000, I always ALWAYS grew Tiger Trail in window light, and since that date, they have almost always been under plant lights.

While the pink version is not ugly, I so enjoy the white version, the PROPER version, of TT that I am going to do an experiment... I am going to put the larger plant in a window, and leave the smaller one on the plant shelf.  I will water both with water only, no fertilizer, for several months.  I will also leech the pots, as you would to flush excess fertilizer salts.

The other plants on my two plant stands are normal, or blooming more intensely than usual.  Nothing has changed it's variegation, or color of leaf backs.  Foliage on all may be slightly more 'brittle' than normal.  I seem to break off leaves just turning pots around or lifting them to place in tray of water, etc.  Two of my three Diamond Girl plants bloomed with much less white in the blossom, but the third is normal although the pink/magenta is dark and bright.

November 8, 2012

Houseplant Class Postponed

The Chinook Adult Ed Houseplant Class has been postponed.  The storm warnings made me nervous and we postponed the first night!!!  :(
The lessons will be online .... shortly after each session, updates will be added to the lessons section of AfricanVioletFun.Com.